
 https://soilandhealth.org.nz/wp-content/uploads/2026/04/Screenshot-2026-04-22-at-11.26.59-AM.png
812
1622
membership
https://soilandhealth.org.nz/wp-content/uploads/2024/09/Soil-and-Health-Association_logoFA-web2024.jpg
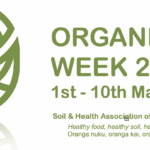
membership2026-04-29 15:25:262026-04-29 15:25:29Organic Week returns with online events on soil, food and health
https://soilandhealth.org.nz/wp-content/uploads/2026/04/Screenshot-2026-04-22-at-11.26.59-AM.png
812
1622
membership
https://soilandhealth.org.nz/wp-content/uploads/2024/09/Soil-and-Health-Association_logoFA-web2024.jpg
membership2026-04-29 15:25:262026-04-29 15:25:29Organic Week returns with online events on soil, food and healthOur Mission
We champion society’s collective responsibility to protect the health of our soils for future generations. We do this to promote the development of the best physical health and spiritual well-being of all people.
Our guiding principle is oranga nuku, oranga kai, oranga tāngata / healthy soil, healthy food, healthy people.
We advocate for organic and regenerative production that works with nature and avoids synthetic fertilisers and pesticides. We’re the largest flax roots membership organisation supporting organic food and farming in New Zealand.
Established in 1941, we’re also one of the oldest organisations of our kind in the world.
You can become a member of Soil and Health today, and support this important work.
– Join Soil & Health or Make a Donation –
Our Latest Posts
https://soilandhealth.org.nz/wp-content/uploads/2026/04/Screenshot-2026-04-22-at-11.26.59-AM.png
812
1622
membership
https://soilandhealth.org.nz/wp-content/uploads/2024/09/Soil-and-Health-Association_logoFA-web2024.jpg
membership2026-04-29 15:25:262026-04-29 15:25:29Organic Week returns with online events on soil, food and health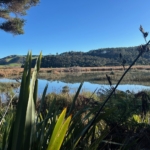 https://soilandhealth.org.nz/wp-content/uploads/2026/03/te-henga-wetland.jpg
1020
1360
Staff Writer
https://soilandhealth.org.nz/wp-content/uploads/2024/09/Soil-and-Health-Association_logoFA-web2024.jpg
Staff Writer2026-04-08 23:16:472026-04-15 15:06:14UPDATE: Te Henga Wetland Spraying with Glyphosate
https://soilandhealth.org.nz/wp-content/uploads/2026/03/te-henga-wetland.jpg
1020
1360
Staff Writer
https://soilandhealth.org.nz/wp-content/uploads/2024/09/Soil-and-Health-Association_logoFA-web2024.jpg
Staff Writer2026-04-08 23:16:472026-04-15 15:06:14UPDATE: Te Henga Wetland Spraying with Glyphosate https://soilandhealth.org.nz/wp-content/uploads/2018/10/busybeach-1.jpg
853
1280
Staff Writer
https://soilandhealth.org.nz/wp-content/uploads/2024/09/Soil-and-Health-Association_logoFA-web2024.jpg
Staff Writer2026-04-08 22:57:502026-04-15 15:10:09Soil & Health Submission on the Natural Environment Bill 2025
https://soilandhealth.org.nz/wp-content/uploads/2018/10/busybeach-1.jpg
853
1280
Staff Writer
https://soilandhealth.org.nz/wp-content/uploads/2024/09/Soil-and-Health-Association_logoFA-web2024.jpg
Staff Writer2026-04-08 22:57:502026-04-15 15:10:09Soil & Health Submission on the Natural Environment Bill 2025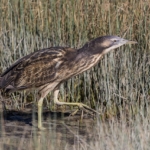 https://soilandhealth.org.nz/wp-content/uploads/2026/03/Australasian_Bittern_in_wetlands-Imogen-Warren.jpg
854
1280
membership
https://soilandhealth.org.nz/wp-content/uploads/2024/09/Soil-and-Health-Association_logoFA-web2024.jpg
membership2026-03-06 16:25:092026-03-06 16:25:11Te Henga Wetland
https://soilandhealth.org.nz/wp-content/uploads/2026/03/Australasian_Bittern_in_wetlands-Imogen-Warren.jpg
854
1280
membership
https://soilandhealth.org.nz/wp-content/uploads/2024/09/Soil-and-Health-Association_logoFA-web2024.jpg
membership2026-03-06 16:25:092026-03-06 16:25:11Te Henga Wetland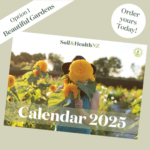 https://soilandhealth.org.nz/wp-content/uploads/2024/11/beautiful-gardens-calendar-2025-soil-health-nz.jpg
1080
1080
Claire Flynn
https://soilandhealth.org.nz/wp-content/uploads/2024/09/Soil-and-Health-Association_logoFA-web2024.jpg
Claire Flynn2025-11-03 16:11:042025-11-03 16:11:052026 Calendars for sale!
https://soilandhealth.org.nz/wp-content/uploads/2024/11/beautiful-gardens-calendar-2025-soil-health-nz.jpg
1080
1080
Claire Flynn
https://soilandhealth.org.nz/wp-content/uploads/2024/09/Soil-and-Health-Association_logoFA-web2024.jpg
Claire Flynn2025-11-03 16:11:042025-11-03 16:11:052026 Calendars for sale!